Check These Bloggers OUT!

Sunday, June 15, 2014

Happy Fathers Day!

A quick post- trust me I know,but I just wanted to wish you guys Happy Fathers Day!!


Thanks to all Dad's:D

Tuesday, June 10, 2014

☼Summer Tips and Essentials☼

Hey Guys,


SUMMER IS HERE!!
I am going to give you guys some tips to make your summer the best summer ever!If this is NOT your summer these tips are still useful:)

Tips

  • Stay Hydrated! Carry water with you at ALL times, or juice you know
  • Sunscreen - I cannot stress how important is to protect your self from the sun, you do Not want a sun burn you need at least SPF 30 on both your face and body
  • Stay away from poison ivy :/ I cant say how much it makes you itch
  • Don't go swimming without an adult or someone who is pretty good at swimming
Essentials:

  • Sunnies to shield your eyes from the sun
  • Sunscreen again, protect yourself
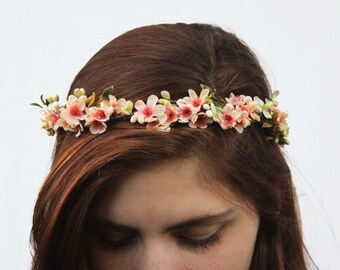
  • Flower Crowns, I have a DIY for them on here:)
  • Hair tie, keep hair out of your face
  • Camera - keep note of the memories
  • Cute neon nailpolish
  • Affordable Flip Flops(the ones in the picture are from rue21

Monday, June 9, 2014

DIY Flower Crown


Flower Crowns are a very cute and simple hair accessories for the summer time, some may have a cute and simple not too out there pattern like this *these pictures are NOT owned by me*(the tutorial pictures are though)


or super CRAZY like this


Anyways this cute headband / crown can be up to$30+ in different stores so I decided to make a DIY for you :)

Materials:
-Fake Flowers(0.79 cents at Michaels Craft Store)
-Elastic :Best at the color of your hair ($2.00 at Michaels Craft Store)
-Hot Glue Gun(Unknown Price)
-Scissors


1. Take the elastic and measure around your head, then use hot glue to secure the ends together.


2. Lay out the flowers that you want to use


3. Cut off the end and hot glue them to the elastic.


4. Repeat this process on all the flowers and you have a easy and cute flower crown ready for ya, now you can wear them to the park or a picnic , or wherever you want and be like swag:)


Friday, April 18, 2014

Cool signature at the end of a blog post

Hey Guys,
want this..


then just keep watching!

https://www.youtube.com/watch?v=Kht19c5Q1uE

thanks guys,

ttyl

bye

DIY FAVICON

Hey Guys,

Today you are going to learn how to make a favicon...

https://www.youtube.com/watch?v=5MEJhylhJMc

Bye

if this tutorial was helpful comment in the comment box


NEW FAVICON!!!

what is a favicon?

I'n 1-2 days I'm going to have a new favicon!

And i will make a tutorial on how to make one!!

so my new favicon will look like this


TTYL 

ROOM DECOR❤️

I know spring is finally here...SPRING CLEANING and DECOR.


Decor can be pretty expensive so I have come up with some simple inexpensive ways to spice up your little space!

1:Dress Display


If you are a fashionista,like me, you may have some really cute dresses or shoes that you love..put them on display,simply take a pushpin, slide the dress(with a hanger) on it and you are done! As for shoes lay them out in any pattern.


2:Heart Picture collage:


Have alot of pictures you love but don't know where to put them? This DIY is perfect for you.
Simply lay out a bunch of your favorite pictures, tape them to the wall with double sided tape and BAM.. your DIY is complete and

*this picture is not mine because I can't and don't want to share personal info*

Credits: Bethany Mota (Google Images)


3: Nail Polish Organizer:


I know, it's hard to keep track of all those nailpolishes, so I made up a simple way to store those polishes to keep them nice and organized, and also add a pop of color to an empty dresser,bathroom or vanity. First, take off the lid of a shoe-box, then organize your nail polishes in any sort of way you would like, for an added bonus- take some nail supplies,(nail file, cotton balls,nail polish remover)and add them either in a cup beside the shoe-box lid...or in it!


Thats all for this post.

Hope you guys try these amazing DIY projects

Bye


Friday, April 11, 2014

ULTIMATE SLEEPOVER GUIDE

Hi Guys,

This is THE ULTIMATE SLEEPOVER GUIDE
1- Invites-

invite them in email, invitation on paper and make sure your parents are okay with this

2- Pack- 

somepeople may have forgotton stuff so maybe have an extra toothbrush or a pair of clothes they can use

3- FOOD

cookies
chips
candy
hot cheetos 
you guys can bake
DIY smoothie which might be my next post!

4- ACTIVITIES-

-pillow fight
-blindfold makeup challenge 
-face mask (diy)
-truth
-truth or dare
-watch a movie 
and maybe a favorite of the group

5- PLAN DINNER/BREAKFAST 

on www.i-want-to-do-it.blogspot.com she has a delicious crepe recipe you should check it out

6- IF ALL ELSE FAILS
- just have fun
- your sleepover doesn't have to be at a mansion to be AWESOME


See ya ,

Have Fun and stuff your face with popcorn


DIY Youtube Channel Banner

Hi,

This tutorial is going to be how to make a youtube channel banner, or just a cool thing to use as a book mark, or put in your binder.


Materials:
Computer
Working mouse(Computer mouse)

Watch this video to learn how : YAY BETTER QUALITY PICS AND CAMERA YO
https://www.youtube.com/watch?v=4rzr9EiO0d0


Yay,

Have Fun


Monday, March 24, 2014

Study Tips

Hey Guys,

I know a bunch of us are having testing everyday, week ( idk guys) but today I am going to show you how to study for them tests LOL.

Get comfy :
I don't know about you but sitting at a desk kind of makes me un-comfy so find your favorite spot a bed , couch, ect. and bring your text books and pencils there

Turn off all distractions:
You know that TV , Ipad, phone , twitter, instagram, tumblr , kik, snapchat ,ect.

Use colorful highlighters and pens:
 
You guys.. i'm kind of obsessed with those highlighters ( they are neon, don't judge)

Good old fashioned flashcards:
words on one side definition on the other

Good Luck ,

Talk to you guys later ✌


Friday, January 10, 2014

Next Rainbow Loom Bracelet

Hey Guys so here  are some options for the Rainbow Loom tutorial

These pictures are not mine I got them from Google Images

Thanks For Looking!!

Triple Single or Waterfall  


Fishtail


Ladder Bracelet


Next Nail Design Request

Hey Everyone ,

I was wondering what you would like to see for the next nail tutorial

The following pictures are not mine I got them off of Google Images

   
Rainbow 1                                  Strawberry

Rainbow 2

So you have three to choose from and also leave a comment in the comment box for any more nail requests☺


Sunday, January 5, 2014

CUTE SMILEY FACES AND TYPED ICONS TO COPY AND PASTE

cute face (。◕‿◕。)
excited☜(⌒▽⌒)☞
shrug face ¯\_(ツ)_/¯
flexingᕙ(⇀‸↼‶)ᕗ
wearing headphones d^_^b
kirby dancing<('.'<) <('.')> (>'.')>
 

SORRY KIND OF GOT TIRED OF LABELING 

  • (◕‿◕✿)
  • (✖╭╮✖)
  • (≧◡≦)
  • (¬_¬)
  • (◑‿◐)
  • (◕‿-)
  • ✖‿✖
  • (-’_’-)
  • (╥_╥)
  • (╯_╰)
  • (╯3╰)
  • (o_-)
  • (¬‿¬)
  • (◣_◢)
  • (∪ ◡ ∪)
  • (≧ω≦)
  • o(≧o≦)o
  • (⋋▂⋌)
  • (॓_॔)
  • (╯ಊ╰)
  • (─‿‿─)
  • ‹(•¿•)›
  • (╯︵╰,)
  • (︶︹︺)
  • (∩︵∩)
  • (。◕‿◕。)
  • (⊙_◎)
  • (~ ̄▽ ̄)~
  • (︶ω︶)
  • (+_+)
  • (。♥‿♥。)
  • (✿ ♥‿♥)
  • ♥╣[-_-]╠♥
  • ٩(͡๏̯͡๏)۶
  • ٩(-̮̮̃•̃)۶
  • ٩(̾●̮̮̃̾•̃̾)۶
  • ٩(-̮̮̃-̃)۶
  • ٩(×̯×)۶
  • (∩▂∩)
  • (¬▂¬)
  • (╯◕_◕)╯
  • (╹◡╹)凸
  • (▰˘◡˘▰)
  • (☞゚∀゚)☞
  • ლ(╹◡╹ლ)
  • (✿◠‿◠)

Saturday, January 4, 2014

DIY Heart Nails

Hey Guys ,
 
  Today I am going to be showing you how to make heart nails these nails are perfect for any occasion whether it be a party or a road trip!

Materials:
  • Base Coat 
  • Top Coat
  • Any Nail Polish 
1. Start off with a Base coat to protect your nails then paint your nails any color in my case white


 2.Take your polish and swipe two lines diagonally opposite from each other.


3. Reapeat on other nails for desired look and you have some super cute heart nails.


4.Don't Forget to add a top coat this will seal in your nail art and add a beautiful shine!

How To Draw : A REALLY CUTE BUNNY

1.  Start off by drawing a curvy U shape

2. For the body draw a sort of acorn shaped figure

3. For the arms and feet draw some rounded rectangles.

4. For 1 ear draw a rounded rectangle and for the other draw a kind of boot like shape
5.For the eyes draw 2 circles, in the 2 circles draw two touching semi circles and shade in the rest.

6.For the nose draw a tiny circle and for the mouth draw a upside down Y.

Hope you enjoyed this tutorial!

Bye!


Friday, January 3, 2014

HAPPY NEW YEAR!!!!!!

HAPPY NEW YEAR!!! 2013 just flew by and thank you guys so much for supporting me and helping this blog grow. I also wish you a very merry Christmas, Hannukah, Kwanza or whatever you guys celebrate and just remember 2014 could be your year to shine!!


Comment down below if you know what move this dialogue is from

“It’s so cute. Like little baby unicorn” 

DIY Cute and EASY Duct Tape Bow

Hi everybody,
Todays DIY is a Duct Tape Bow!!

Materials:
Duct Tape
Scissors

1. Cut out a thin strip of duct tape


2. Next cut out a thick strip


3. Fold the thick strip in half.


4. Take your half folded thick strip and pinch it in the middle
5. Wrap the thin strip around the pinched part of the thick piece and there you have your Duct Tape Bow!

MIGI NAIL ART REVIEW

Hey Guys,

Sorry I haven't posted in a while! I have just been really busy for the past couple of months!!

Today I will be reviewing MIGI Nail Art.

What is MIGI Nail Art??

MIGI Nail Art is a nail art brand that can be purchased at a website( http://www.miginailart.com/) It comes in many different colors and styles.Some of the most popular styles are :


The structure of the nail art pen is a nail art tip and also a regular polish brush. After the nail art pen runs out you can get free refils and replacements.
Each pack cost about $20 and comes with 8 vibrant colors. They work wonderfully and are a great gift for anyone who is just starting out nail polish or are already nail polish addicts!!